Advertisement

LightBlog

Breaking

Test Blog

Sunday, May 20, 2018

May 20, 2018

How to Create a Cinemagraph in Photoshop


What is a Cinemagraph?

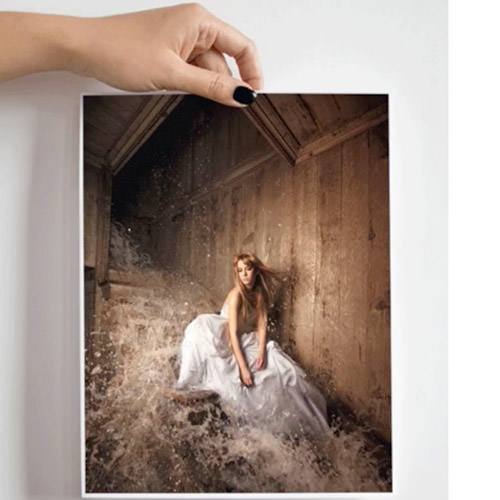
Cinemagraphs are commonly produced by taking a series of photographs or a video recording, and, using image editing software, Compositing the photographs or the video Frames into a seamless loop of sequential Frames. This is done such that Motion in part of the subject between Exposures (for example, a person’s dangling leg) is perceived as a repeating or continued motion, in Contrast with the stillness of the rest of the image.

Capturing Footage for a Cinemagraph

At first we planned on just teaching you how to create a cinemagraph as a Photoshop GIF. Then we realized that it’s just as important to know how to shoot a cinemagraph with your camera before taking it into Photoshop.
Here are some things you’ll need in order to capture footage for your cinemagraph:
  • A camera that can record video (Anything from a DSLR to an iPhone)
  • A sturdy tripod (You’ll need your scene to be relatively still in order to really achieve this effect. A sturdy tripod is one of the best ways to ensure your Framing is consistent.)
  • A subject (Something or someone that is doing something with a continuous movement. In our case we used a record player. As long as there is a distinct starting and stopping point.
It will take a little practice to find the perfect subject, but get out there and have fun trying to create your own cinemagraph!

Using Photoshop to Edit Your Cinemagraph

After you’ve went out and shot your footage to create your cinemagraph, it’s time to bring it into Photoshop. That’s right, Photoshop does also offer video editing features!
We start by importing our footage into Photoshop just like we would with any other still image. Once you’ve brought your footage into Photoshop, it should pop up with your video Timeline. If you don’t see your Timeline, just go up to Window, and down to Timeline. The editing of your footage for a cinemagraph revolves around one concept. Your end Frame needs to be the same as your beginning Frame. That way it will create a continuous loop that looks completely seamless.
Once we have our clips set up how we want, we need to use keyframes to adjust the visibility of the layers, or the Opacity. We set up our top clip with the Opacity set at %100 and we gradually Fade it out to %0. This will cause your top clip and bottom clip to blend together perfectly.
Next we use a Stamp Visible Layer and paint black over the areas we want visible. In this case with the footage we are using, we painted black only over where the waves are. This is what really helps sell the effect. Sometimes everything in your scene won’t work for a continuous motion, so creating a Stamp Visible Layer is a great way to control where the Motion is coming from.

Saving & Exporting

Now that you have finished editing your Cinemagraph in photoshop, it’s time for the export. You want to make sure you go to your menu and click “Save for Web”. After that make sure that the file type is a GIF. PNG files and Jpeg files do now support motion so it won’t work if you don’t export your file as a GIF. One of the cool features is you can simply click and drag your export Cinemagraph file into google and see how it would look on the Web.
May 20, 2018

How to Edit Video in Photoshop


Editing Video

Why would you use Photoshop to edit video?? Well, a professional video editor is most likely going to use a video centric program rather than Photoshop (Adobe Premiere Pro, Adobe After Effects, Final Cut, etc.) However, it can be very useful to Color grade your videos and apply Filters to them- especially if Photoshop is the only program available to you. For someone familiar with Photoshop, this should come surprisingly easy. This is because you can think of editing video in exactly the same way as editing photos! It’s practically an identical process, which can be a huge advantage.

Part I: Importing Video into Photoshop

1. For the first method for importing footage, go to File – Scripts – Load Files into Stack. From there, select the clips you are planning on working with by clicking Browse. After clicking OK, they will load into the same document.
If you are currently thinking, “Hey! Where do I see my actual footage?!” we have an answer for you! Simply go to Window – Timeline, and you will see the full length of each clip Stretch out across Photoshop. This Timeline is the base for all of your video editing, and is where you will cut and Arrange your clips.
By default, each clip is stacked up on top of each other. But this is not what we want! We need the clips to sit one after another in one solid sequence. To fix this, select all of your clips in the layers panel. Then, click on the little film strip icon on the timeline and select ‘New Video Group from Clips.’ You will see them group into one folder in the layers panel, and they will also be laid out horizontally on the Timeline.
2. The second method for importing footage starts by clicking Ctrl/Cmd + O (Open). Then, select which clips you would like to use. If you would like to add any more later, click on the film icon on the timeline and select ‘Add Media.’ Then, the additional footage is placed after the other footage in a Linear fashion.

Part II: Using the Timeline

One of the first things you will want to know is how to rearrange video clips! This can be done by moving the layers around in the layers panel, or just dragging them left and right in the Timeline. To navigate through the footage, click and drag the red slider to scrub back and forth.

Part III: Editing Video

Next up is cutting and moving footage around. To cut a clip in half, place the red slider in the middle of it and press the scissors icon. Voila! It will be cut right down the middle. To delete any unwanted sections, just select them and press delete.
One nice thing about this is that you can always get back footage after it’s gone! Hold your cursor over the beginning or end of the clip – wherever you cut it previously – and drag it out to include more video. This works the same for dragging the clip to be shorter as well.

Part IV: Using Keyframes

Keyframes are used to control certain changes over a period of time. A good example of this is making a clip slowly Fade from Transparent to Opaque. Open the video group up on the Timeline by clicking the arrow. If you’d like to alter the Opacity, pull your red slider to where the change should begin. Then, click the little timer icon to create a keyframe. A diamond will show up on the Timeline, which can be clicked on and adjusted manually. In this case, we leave the Opacity at 0%. Then, drag the slider to where the change should end and create another keyframe. Click on it and adjust it again – in this case we change it to 100%. This causes the clip to slowly Fade in, because we had a solid Color Fill layer underneath the clips. Keyframes can always be moved around and adjusted as well.
May 20, 2018

How to Color Grade Video in Photoshop

In today’s episode, we show you how to Color grade video in Photoshop!


Color Grade Video

In today’s episode, we show you how to Color grade video in Photoshop! This is the second section of our 4 part video editing series, and it picks up directly from where we left off in the first section. If you haven’t seen that first episode (How to Edit Video in Photoshop), click here. To follow along with the same clips we work with in this episode, download them here!
Why would you use Photoshop to edit video?? Well, a professional video editor is most likely going to use a video centric program rather than Photoshop. However, it can be very useful to Color grade your videos and apply Filters to them- especially if Photoshop is the only program available to you. For someone familiar with Photoshop, this should come surprisingly easy. This is because you can think of editing video in exactly the same way as editing photos! It’s a practically identical process. Why not have a little fun!

Part I: Using Local Adjustments to Color Grade

Local Adjustments: Affects individual clips
To start off, select the layer you would like to make adjustments to. In the same way you would add adjustments to a photo, we can do the same for that Video Layer! Try it out by creating a new Curves Adjustment Layer. After you adjust the Contrast with Curves, you will notice that it will clip directly to the single Video Layer you applied it to (be sure your clips are grouped into one folder). You can add multiple adjustments to the same layer, just like you could with a photo…cool!

Part II: Using Global Adjustments to Color Grade

Global Adjustments: Affects an entire group of clips (ie everything!)
To adjust all of your video footage at once, make sure that your clips are grouped into one folder (If they are not: Select all of your clips in the layers panel. Then, click on the little film strip icon on the Timeline and select ‘New Video Group from Clips’). Then, create an Adjustment Layer and place it on TOP of that video group. This will apply that same Adjustment to everything consistently.

Part III: Color Grading Techniques

Let’s get started with Color grading! Create a Levels Adjustment Layer, and select only the blue Channel. Drag the black slider in to the right, and blue will be added into the Shadows. Yellowish Highlights tend to look great with cool Shadows, so bring the white slider in towards the left to compliment them. Again, the more color editing knowledge you can pull from your regular Photo Editing skills, the better!
What if you create a global Adjustment, but decide you only want it to affect some of your footage? Have no fear!! Notice that the Adjustment Layers stack on top of the video in the Timeline. You are actually able to click and drag those adjustments and make them last as long or as short as you would like them to.

Part IV: Applying Filters to Video

In order to apply any Filters onto video in Photoshop, it must first be converted to a Smart Object. So, select the layer you would like to affect, right click, and choose ‘Convert To Smart Object.’ Next, go to Filter – Filter Gallery. A preview window will load with an array of options. Feel free to play with the intensity and edges of the Filters; you can always adjust the Filter later as well. When you are happy with the way the Filter looks, select OK. Then, you will need to Render the clip. This is done by simply playing the clip. It will take a moment, and you will know it’s done rendering by the little green line that appears on top of the clip afterwards, and that’s all folks! As you can see, there’s no need to relearn much for editing video in Photoshop. Have a blast editing your own clips, or Download Ours for some great practice.
May 20, 2018

How to Add Transitions and Audio to Video in Photoshop


Add Transitions and Audio to Video in Photoshop!

This is Part 3 of our Photoshop Video Series. If you haven’t seen the previous episodes, be sure to check them out!
And keep your eyes peeled for Part 4!
Let’s get in to today’s episode!

Section 1: Adding Transitions

Transitions are commonly used by video editors everywhere! They allow flexibility when moving from one clip to another, and can completely change the feel of a video. Harsh cuts between scenes can be great, but they are not always the right fit. Examples of Transitions include a cross Fade between two clips, and a fade to black.
Transitions can be found in Photoshop by clicking on the square icon to the right of the Timeline Control Panel. You can change the duration immediately, or wait for later. Simply drag the Transition you would like down onto the Timeline between two clips. From there, you can pull the Transition to be longer or shorter if you’d like.
Again, you don’t always need transitions! They are just creative Tools for you to utilize in whatever ways you choose.

Section 2: Adding Audio

You can turn the audio off or on by pressing the speaker icon on the control panel. However, this is only temporary and will affect the entire Timeline. If you’d like to mute the clips, right click on them and then tab over to the Audio Section (music note icon). Check ‘Mute Audio.’ This will need to be done for each clip. After that is finished, you will notice that the video will be silent even if you turn on the speaker icon. This is helpful because you won’t have to worry about the audio that was captured in camera anymore- especially if you will be adding music.
To add additional audio to your video, go to the Audio Track at the bottom of the Timeline and click on the music note icon. Select ‘Add Audio.’ From there, you can locate the files you would like to use. After previewing the file to be sure it is the correct one, press Open. You can shorten the audio if you need to by clicking and dragging; this is the same technique we used for editing the video.
To fade the audio in or out, right click on the track and adjust the Fade In/Fade Out sliders.
May 20, 2018

How to Create Title Screens for Video in Photoshop

In today’s episode, we show you how to create title Screens, create a layer mask that animates throughout time, and to finish everything off, we’ll show you how to animate Layer Effects in video.


Section 1: Adding a Title Screen and Layer Mask

Title Screens are a great way to brand a video. In our example, we use our Phlearn Logo for the title. If you’ve been following along with our series, all of this should feel familiar.
We start by creating a new video group. We then grab the file we want for our title (in this case it’s our Phlearn Logo) and we drag that into the new video group. We then Transform our logo to the exact Size we want it to be. In our Timeline, our title is on top of all our footage- so we see the Logo on top of our whole video.
In order to add a bit more interest to our title, we add a Layer Mask. We use keyframes on our layer mask to animate what’s visible with our Logo at a specific time!

Section 2: Using Layer Effects Animations

Now that we have our layer mask, we show you how to animate a layer effect throughout time. We choose a drop shadow for our Layer Effect. Then we play with the blending modes, Opacity, and Distance.
Now that the Layer Effect is visible, we keyframe the movements of our Drop Shadow. We change the Angle of the Drop Shadow from one side to the other. Because it’s keyframed, we see the drop shadow move as time goes on. Very cool! This is just a basic example of how you can animate Layer Effects for video in Photoshop.
We end things off by reviewing our final video, and explain some settings so you can export your video and display it on the Web!
May 20, 2018

How to Create a .gif and upload it to Instagram

Draw more attention to your photos by showing before/after animations on Instagram.

In today’s episode, we show you how to create a Before and After image in Photoshop. After that, we show you how to animate it as an Animated Gif.

Getting Started

We start off with a normal .psd file. We strip all of the Adjustments off of the image until we are down to the original. After that, we create a New Layer within Photoshop. On that new layer we go to Image—-> Apply Image. From there you want to make sure your settings reflect the settings you see in the video. Once you hit OK, you will get a copy of everything you see, on a New Layer. Now you have a Before & After. Next is adding the Animation!


How to Add Animation in Photoshop

Since our final destination in this case is Instagram, we need to create a format that we know will work well for  the application.  After we have our desired dimensions, we have 3 layers to work with. A Background layer, an original layer of our image with no changes, and the final image with the changes we’ve made in Photoshop. Turning these layers on and off will help identify which is our Before and After. Now it’s time to animate our image. We use the video Timeline to create a frame Animation. Frame animation just allows us to create individual frames. Now we click—> Make Frames from layers. Now we have 2 Frames in our Animation, the before Frame and the after frame.  We set the duration to 2 seconds, meaning every 2 seconds the Frame will switch from before to after.

Export Settings

After creating the animation, it’s time to make sure our export settings are perfect. We changed the duration of the Timeline to forever. So now the image we see will constantly shift from the before to after.

Uploading to Instagram

Next we show you how to email the file to yourself and upload the image to Instagram.  From there you can choose any Filters or other options that Instagram offers.
May 20, 2018

How to Create a Frame Animation in Photoshop

In today’s episode, we show you how to make a Frame Animation in Photoshop.


etting Started

First we start off by making a selection using the Pen Tool.  We then load that selection as a Layer Mask and bring in a couple images we want in our Frame Animation.

Creating a Frame Animation

Next we open up our Timeline and go to Frame Animation.  We then put our images into the order we want.  When we play our animation, it looks as if we are cycling through different prints.

Finishing Touches

We end it all with exporting our Animation so we can view our work online.